How to Add Crew
Add a new member of crew to a vessel by filling in their name, position, department and contract details on the New Crew Member form.
BEFORE YOU START
You need to be on the correct vessel before adding crew — Sealogical attaches the new record to whichever vessel you're currently viewing. If you manage more than one vessel, use the CHOOSE VESSEL menu in the top navigation to switch first. The only mandatory field on the form is Start Date; everything else can be filled in later from the crew member's profile.
Step 1: Open the Crew module
From the vessel dashboard, click the purple CREW tile. This takes you into the crew area for the vessel you're currently viewing.
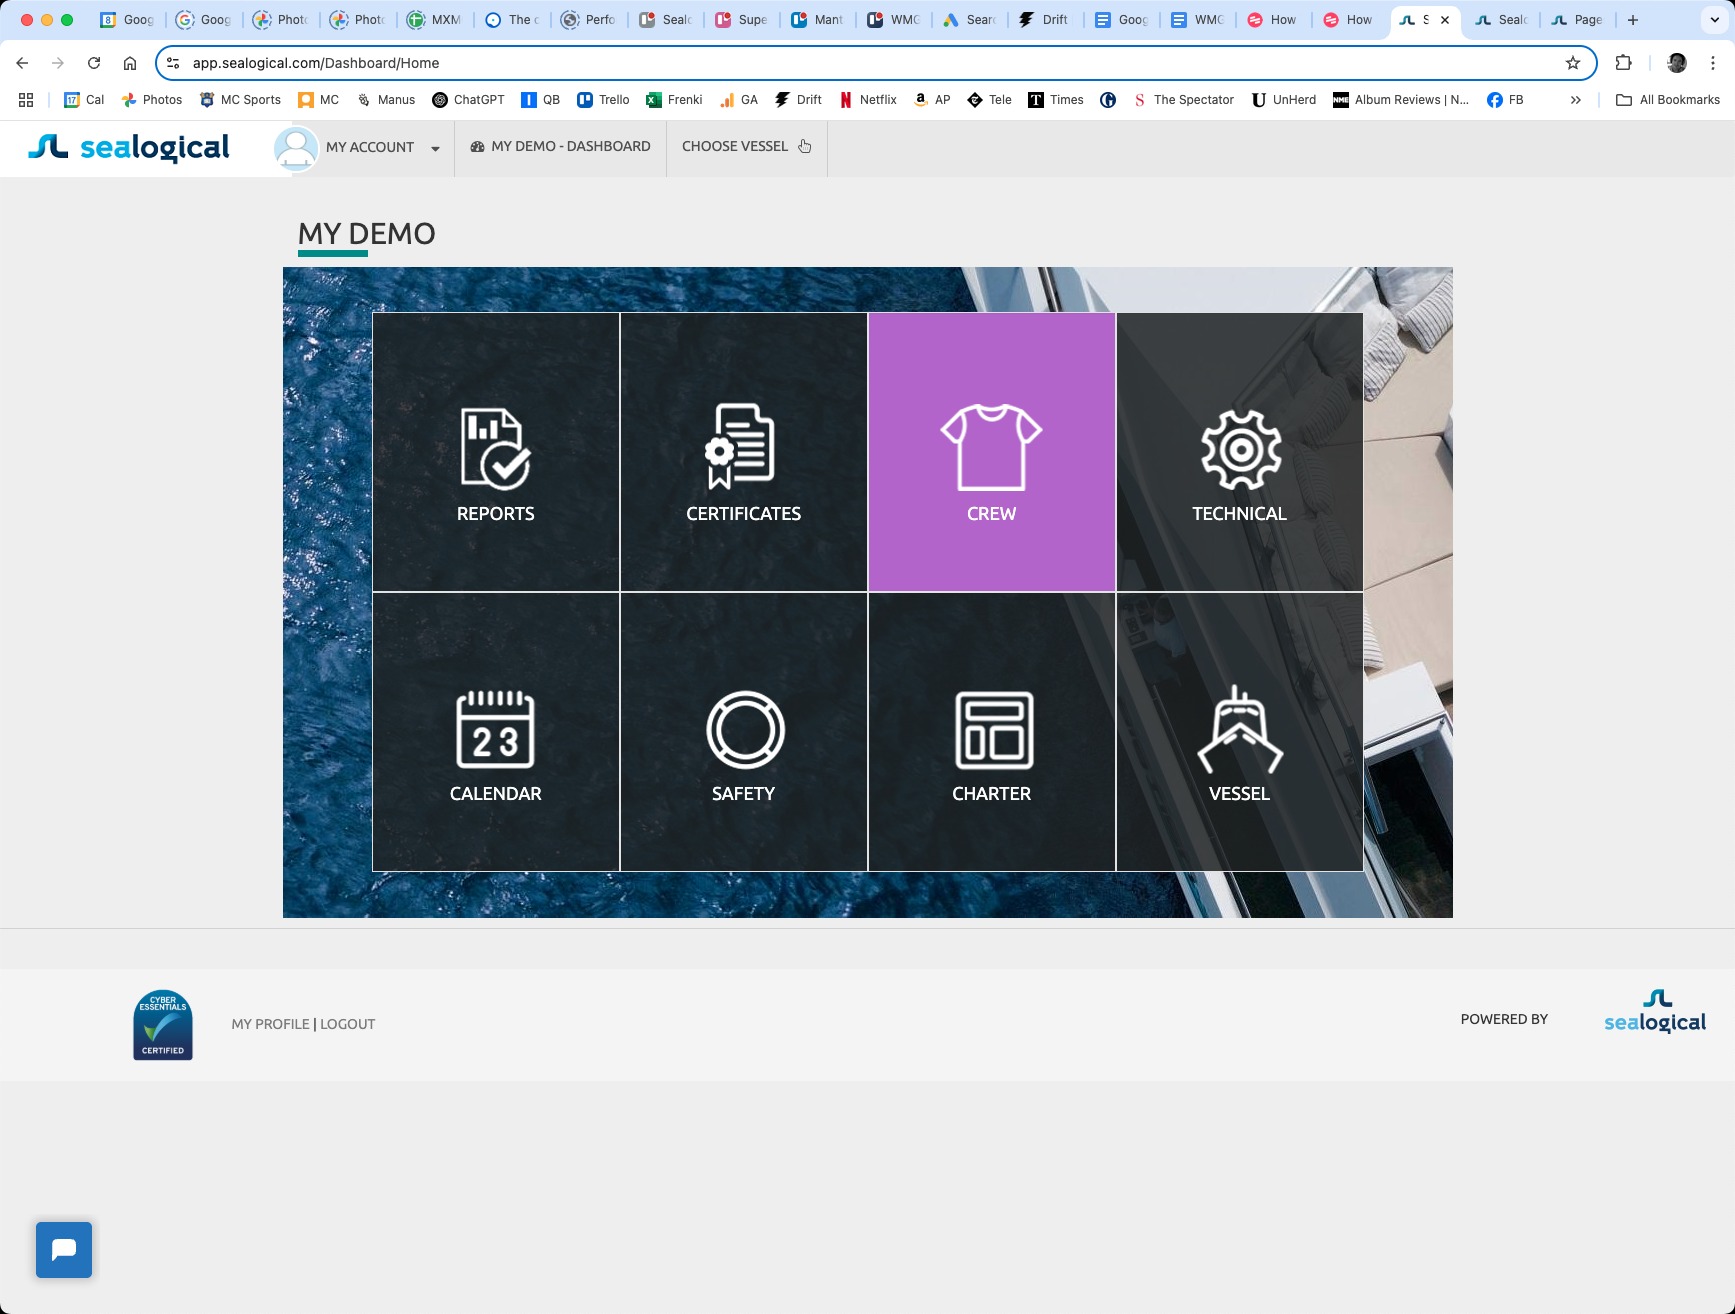
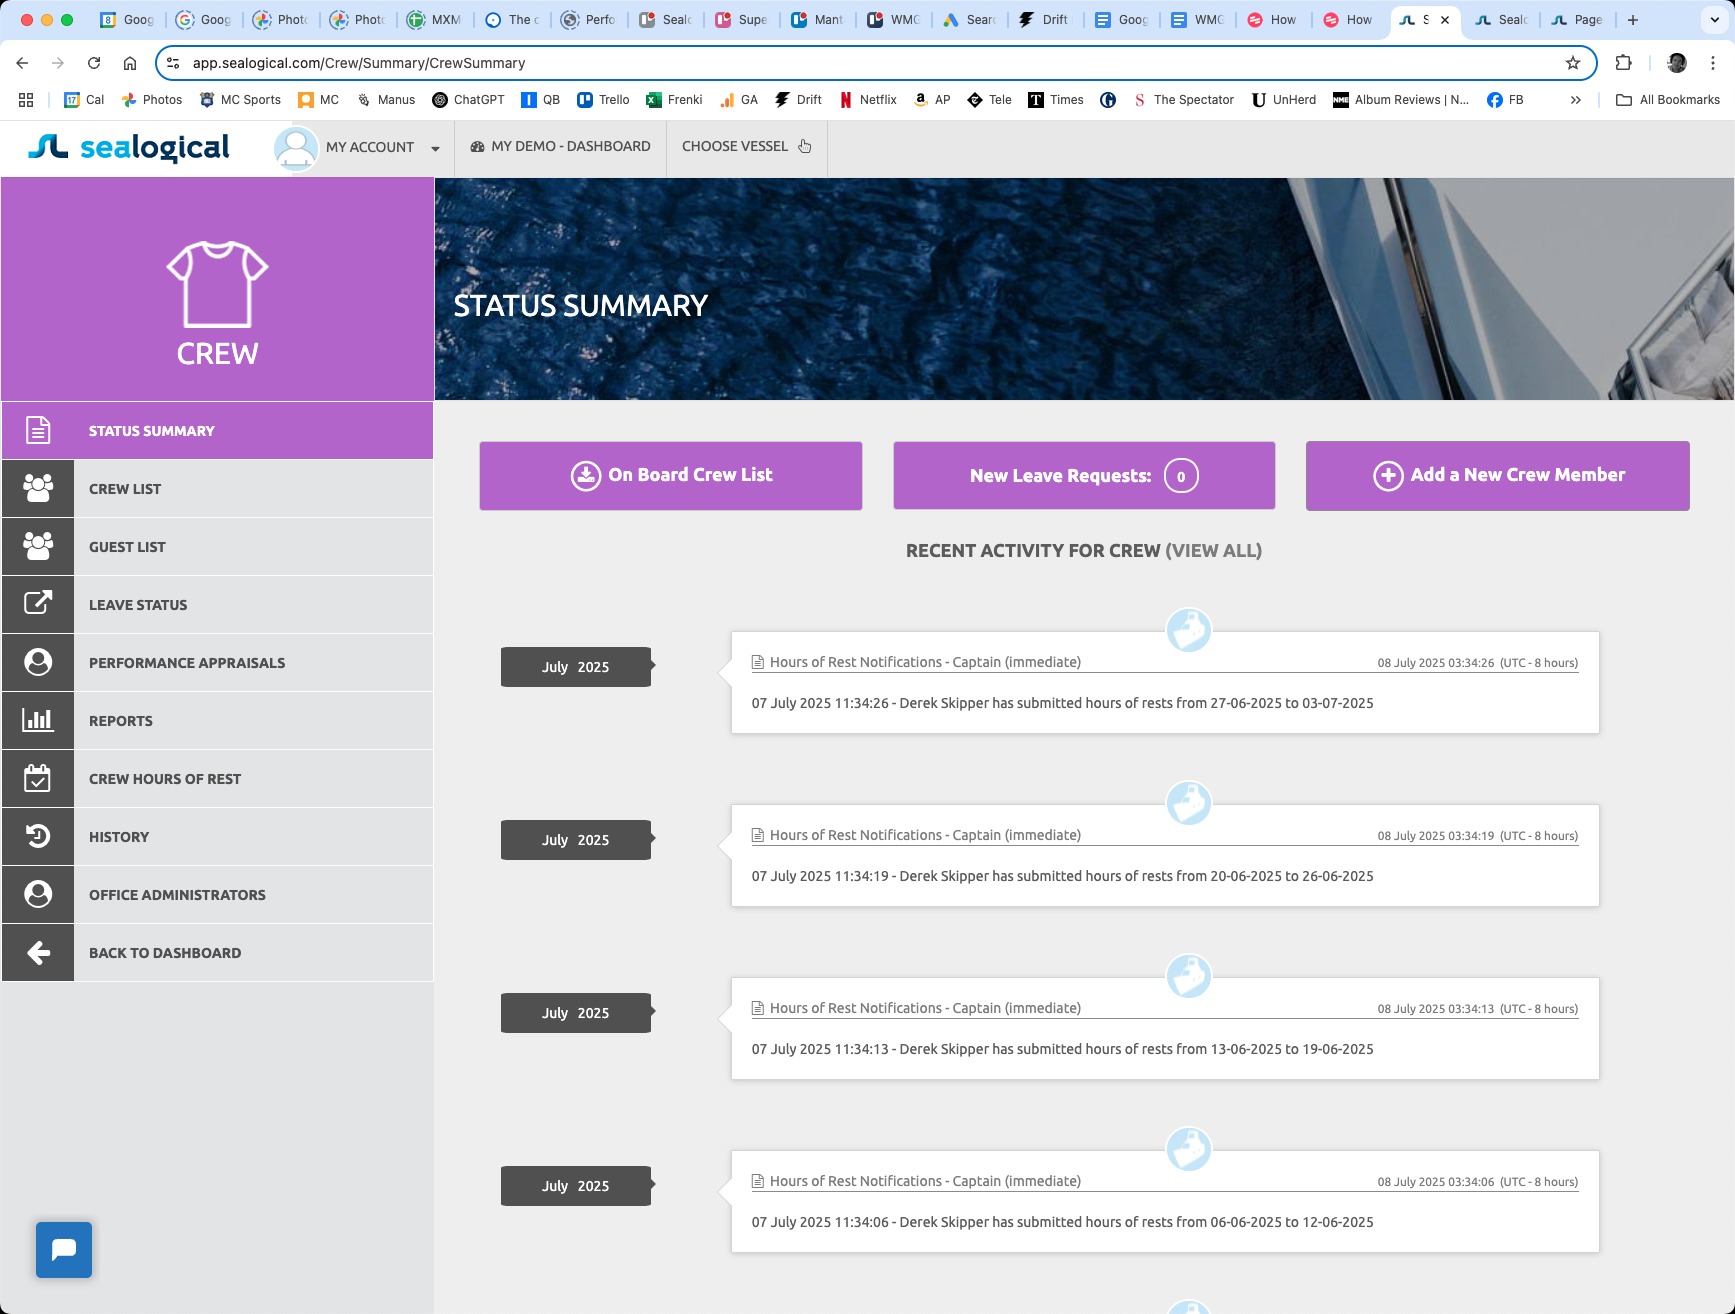
Step 2: Click Add a New Crew Member
On the Crew Status Summary page, click the purple Add a New Crew Member button on the top-right. (You can also reach the same form by clicking Crew List in the sidebar and using the Add button there.)
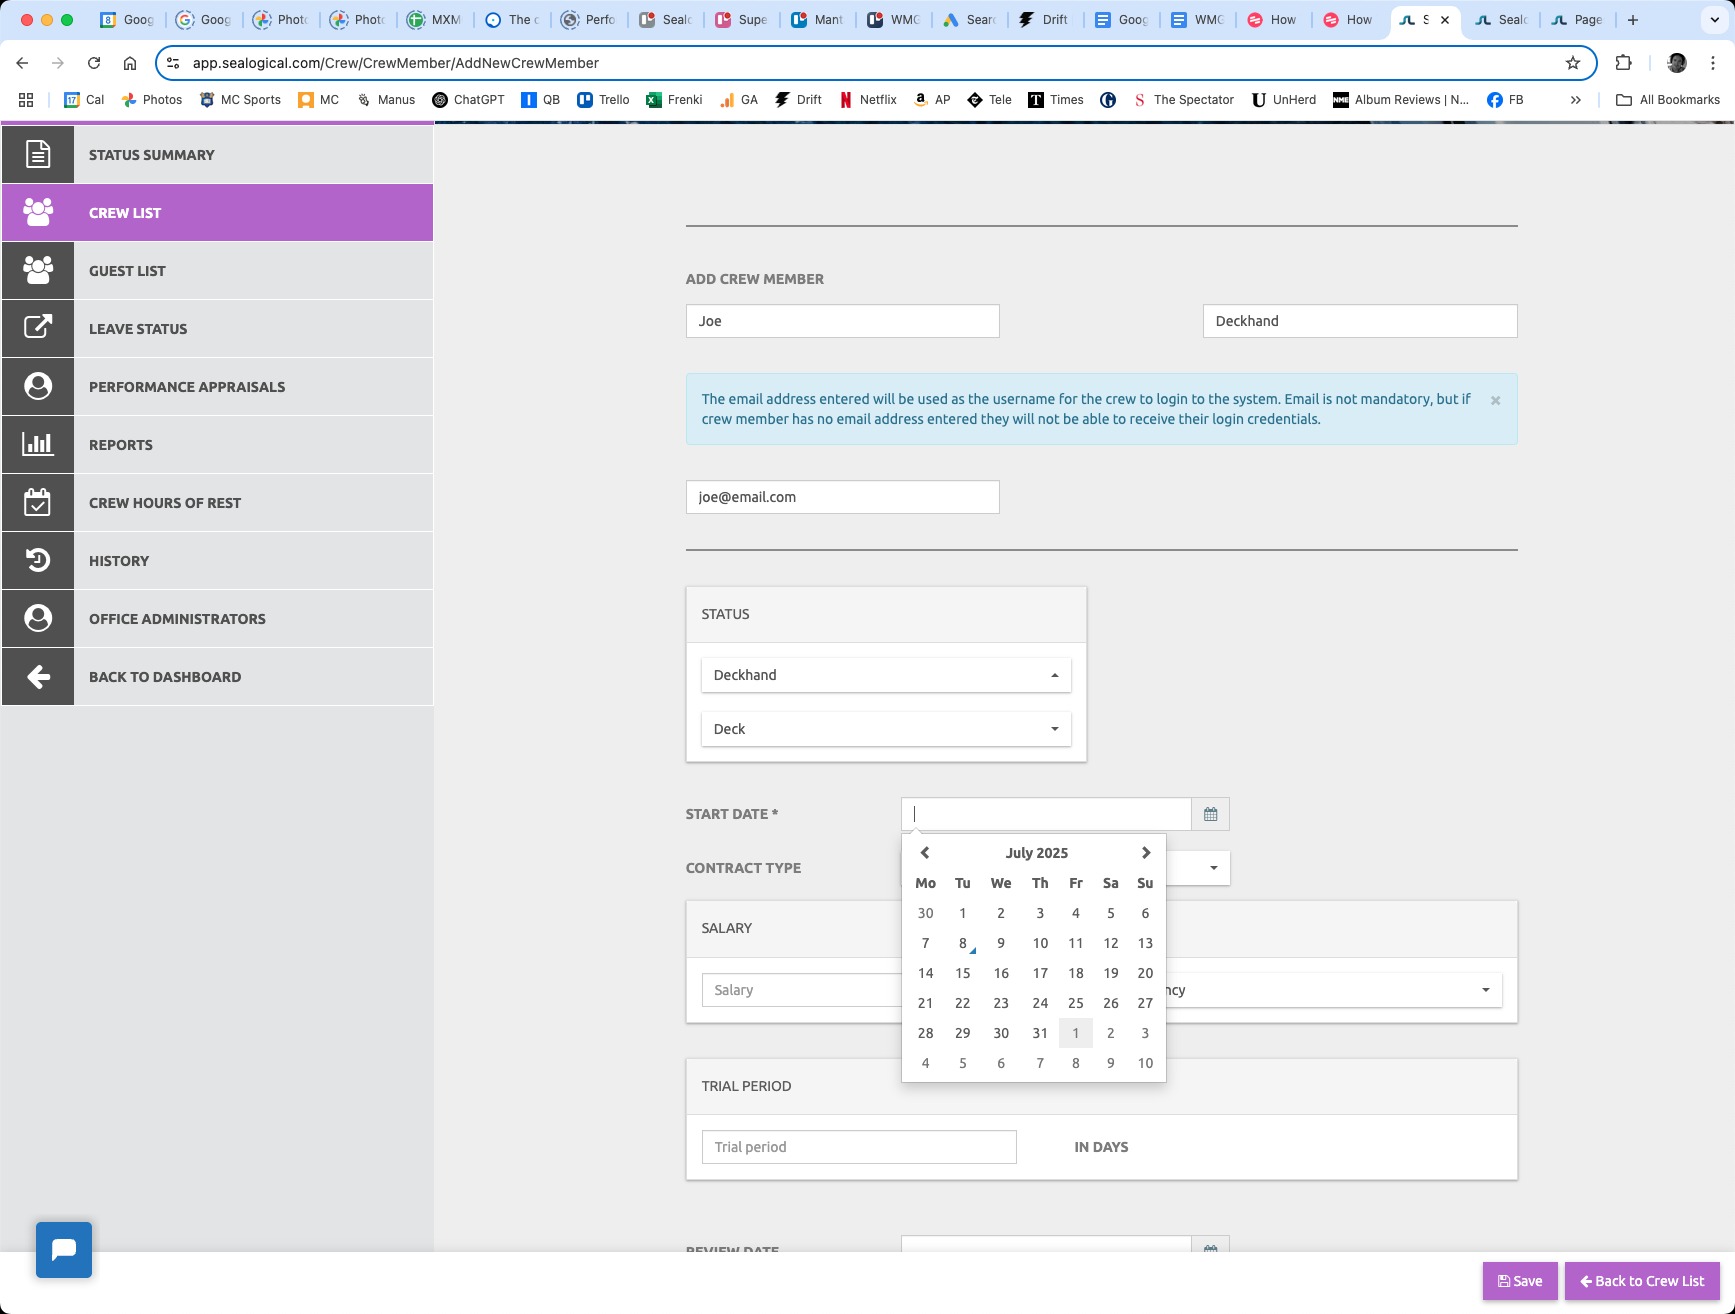
Step 3: Enter their name and email
In the ADD CREW MEMBER section, type the crew member's first name and last name. Then add their email address in the field below the blue info panel — this becomes their username for signing in to Sealogical and is where their login credentials are sent. Email is optional; leave it blank if the crew member shouldn't have platform access.
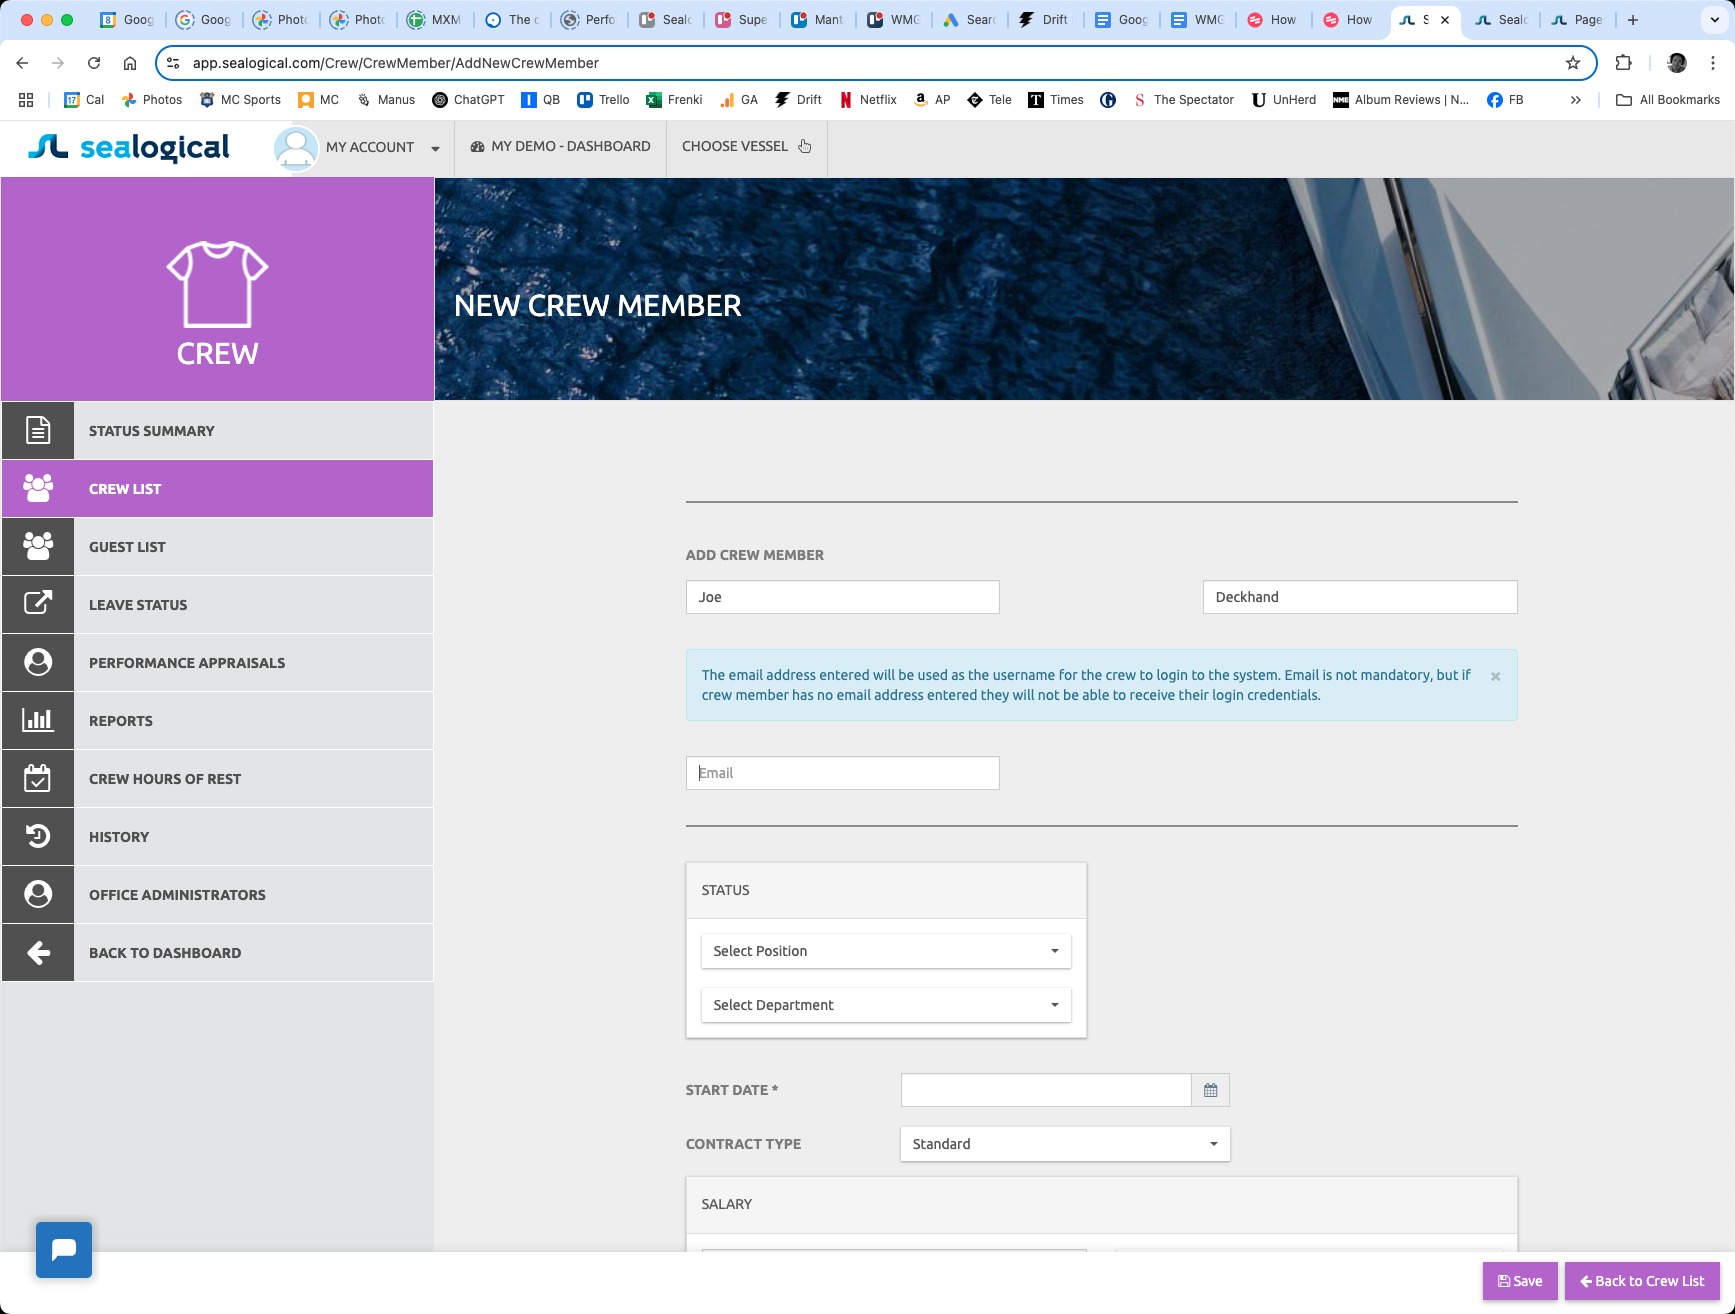
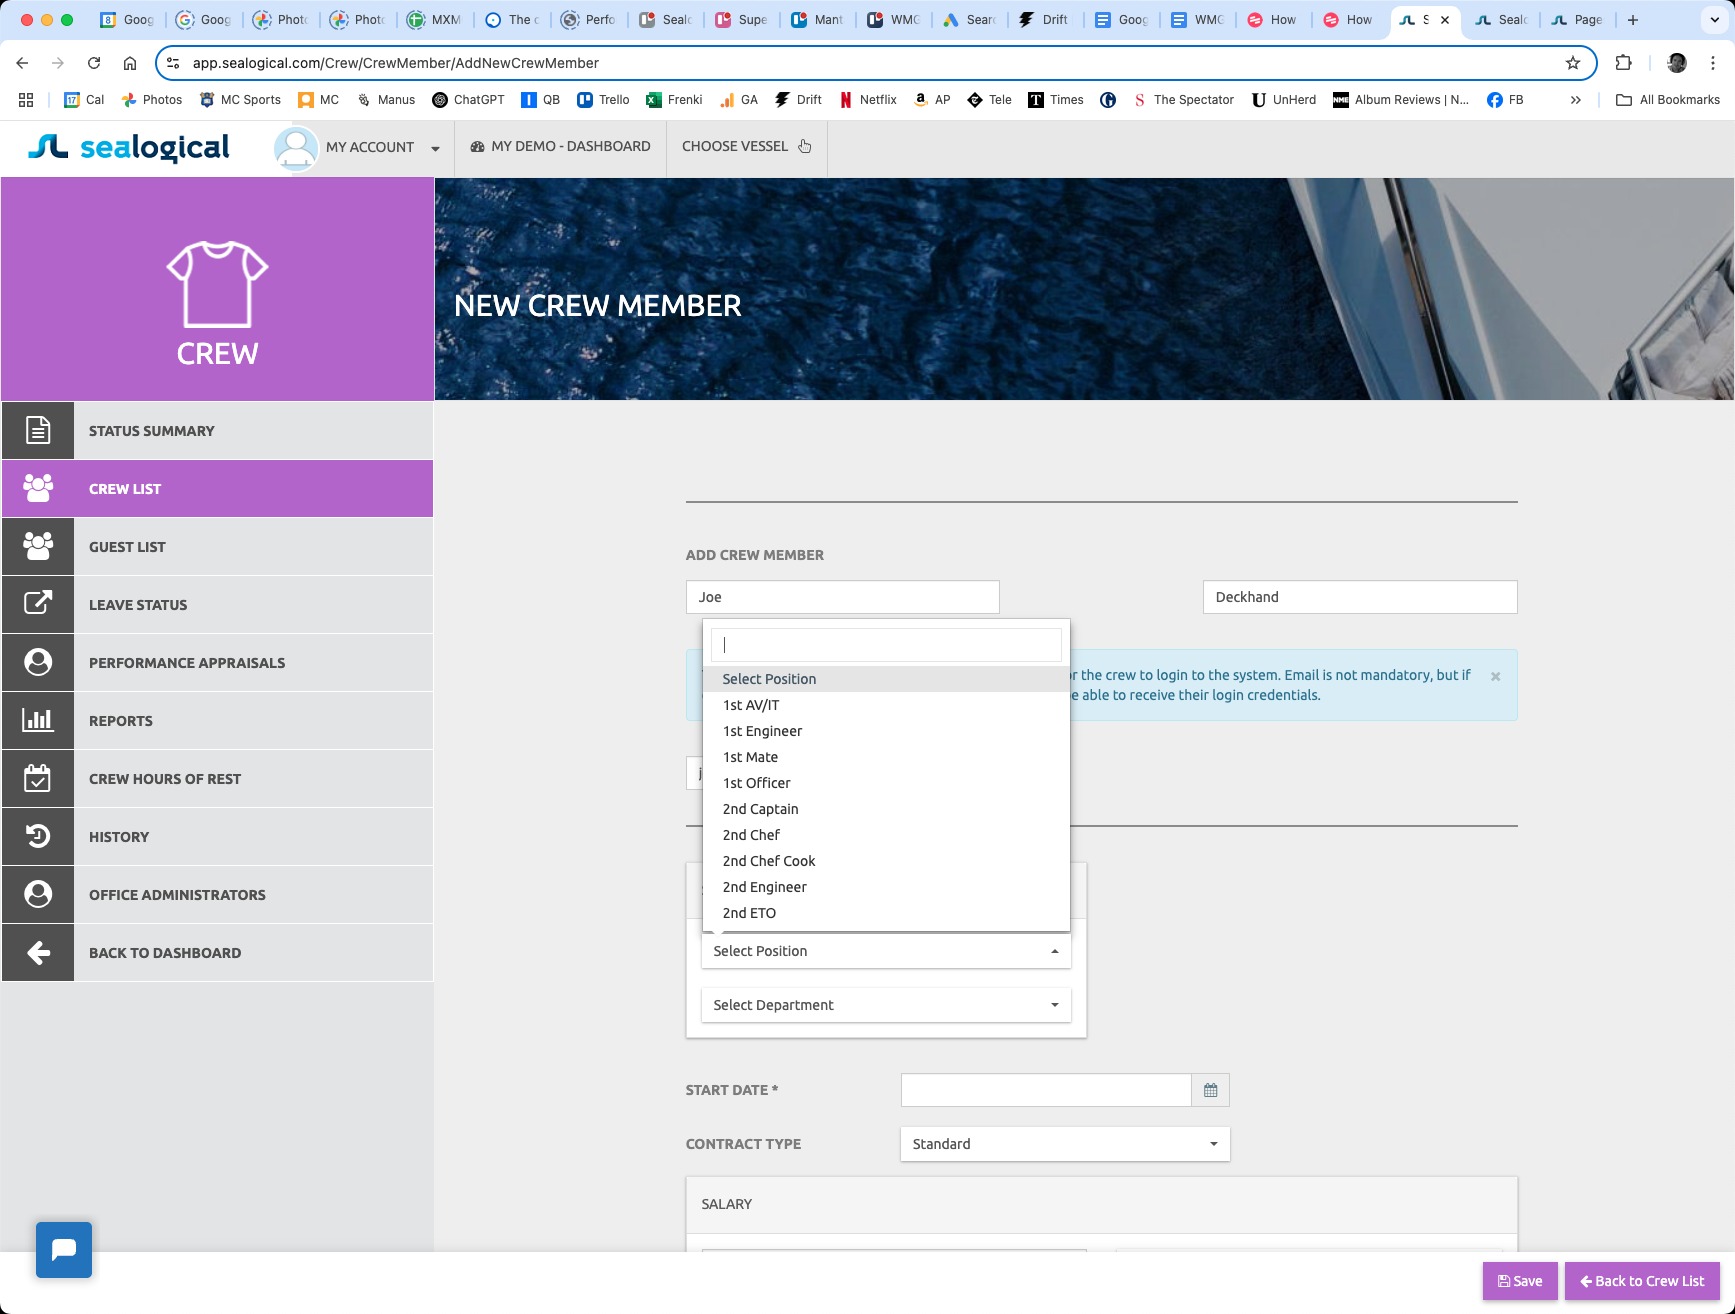
Step 4: Pick their position
In the STATUS panel, click Select Position. The dropdown lists standard maritime ranks — 1st AV/IT, 1st Engineer, 1st Mate, 1st Officer, 2nd Captain, 2nd Chef, Deckhand, and so on. Use the search field at the top to filter quickly, then click the position to select it.
Step 5: Pick their department
Open the Select Department dropdown directly below the position. Choose from Deck, Engineering, Interior, Security, AVIT, Bridge, Galley or Other. The department drives later filtering and reporting — for example, when you generate a crew list grouped by department.

Step 6: Choose their start date
Click the calendar icon next to START DATE and pick the day the crew member begins the contract. This is the only required date field — the form won't let you save without it.
Step 7: Fill in the remaining contract details and Save
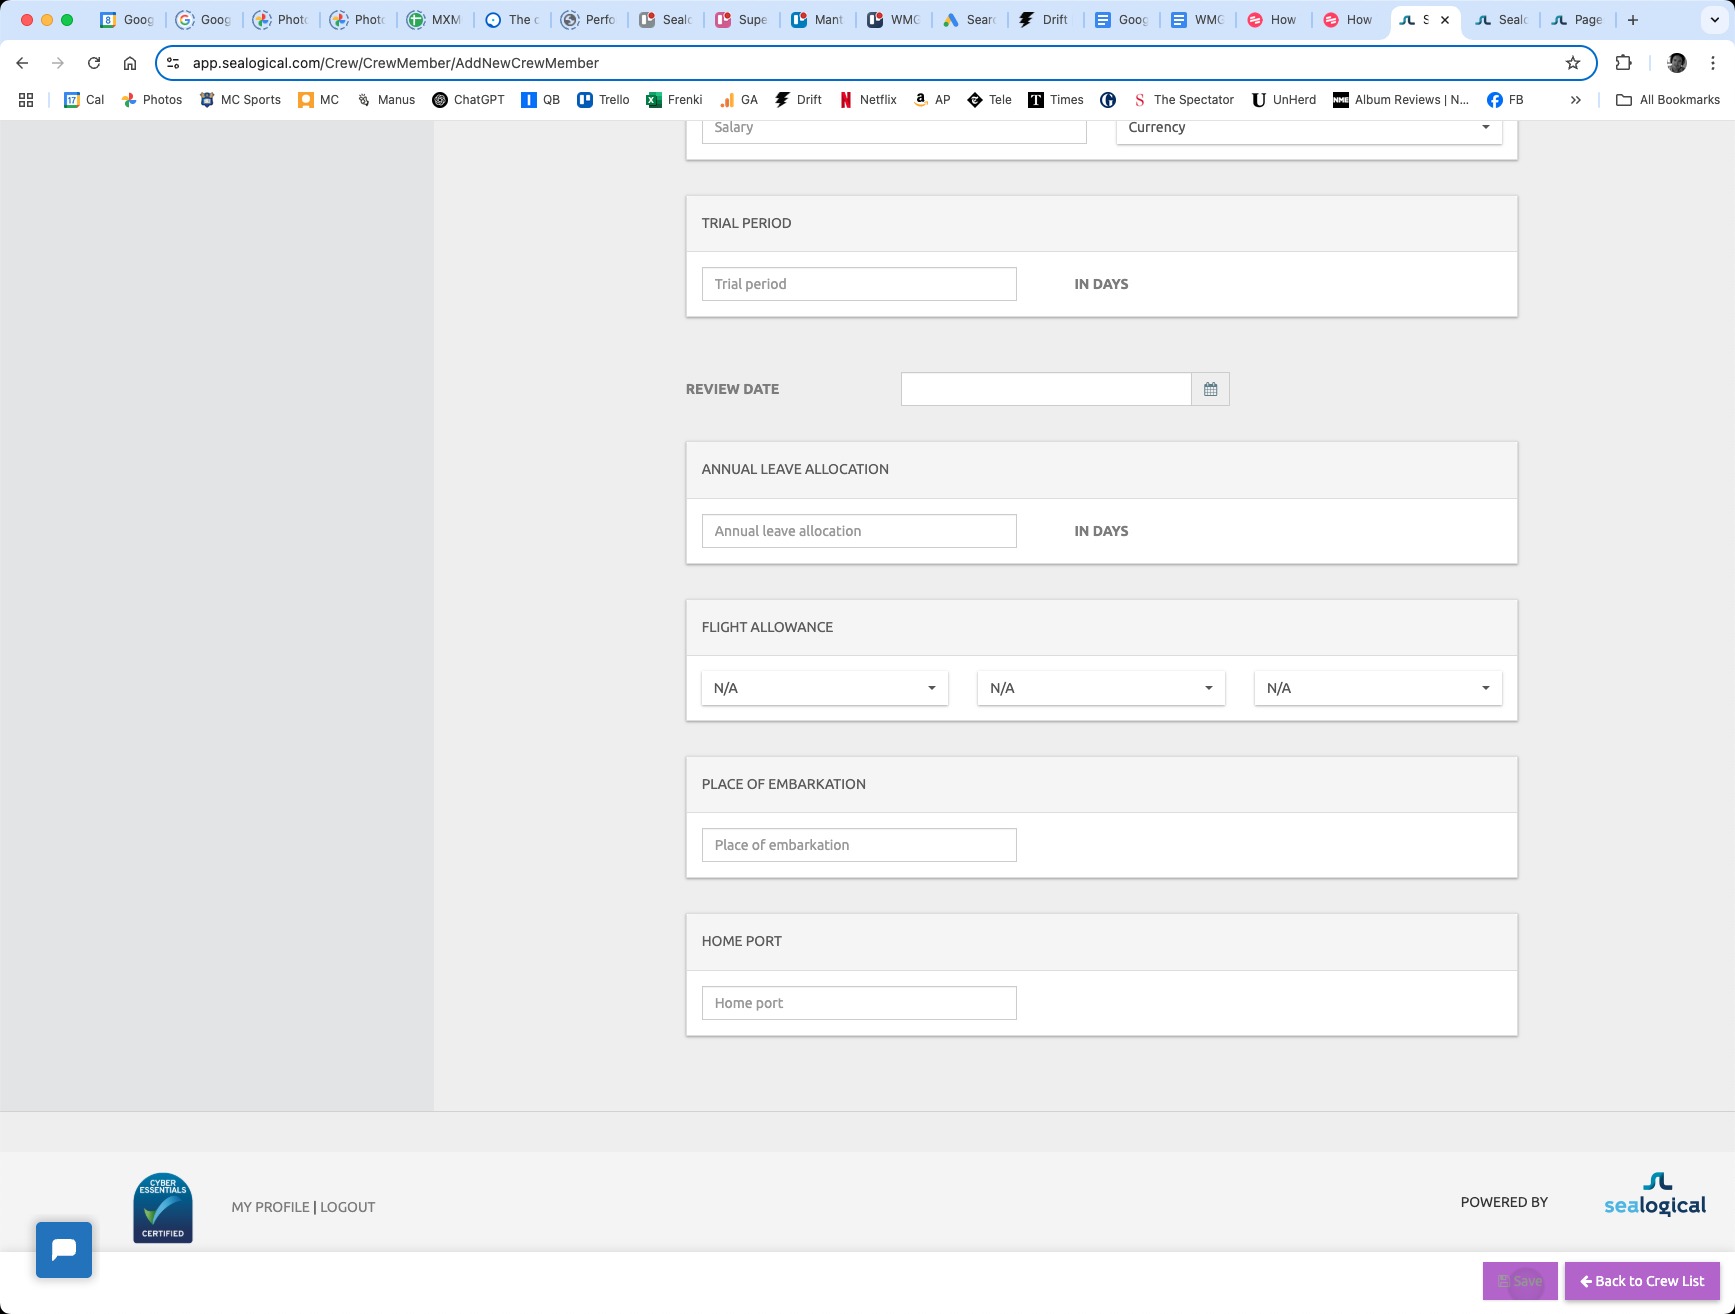
Scroll down to fill in any of the optional contract details: Contract Type, Salary and currency, Trial Period (in days), Review Date, Annual Leave Allocation (in days), Flight Allowance, Place of Embarkation and Home Port. All of these can be left blank and added later from the crew member's profile. When you're ready, click the Save button in the bottom-right — the new crew member appears immediately on the Status Summary, the Crew List, and across the rest of the modules.
Frequently Asked Questions
Does the crew member need an email address?
No. The email field is optional. Whatever you enter becomes the crew member's username for signing in to Sealogical, so use their work email if they need access to the platform. If you leave it blank they will not receive login credentials and won't be able to sign in themselves — fine for visiting crew or rotational crew managed entirely from the office.
Which fields are required to save a new crew member?
Start Date is the only field with a required-asterisk on the form. In practice you'll also want a first name, last name, position and department for the record to be useful elsewhere in the platform — but the form only blocks the save when Start Date is empty.
What happens after I click Save?
The new crew member appears immediately on the Status Summary and Crew List, and starts showing up across the rest of the modules — Hours of Rest, Leave, Certificates, Performance Appraisals and so on. If you entered an email, the crew member also receives login credentials to that address.
Can I edit these details later?
Yes. Open Crew List from the sidebar, click the crew member's row, and edit any of the fields. Changes save back to the same record — there's no need to remove and re-add them when their position, salary or contract details change.
Can I add a crew member to more than one vessel?
Each crew member belongs to one vessel at a time. If a crew member rotates between vessels in your fleet, end-date their contract on the current vessel and add them to the next one — their certificates and history travel with them.
~ Need more help?
Still stuck?
If you can't find what you're looking for, our support team is happy to help.
Contact Support